Saturday, September 7, 2013

Classroom Reveal

Well, we've been in school for 2.5 weeks now, and I'm finally getting around to showing off my classroom.

 Hopefully, as I settle into a routine, I'll find the time to post about this first few weeks.

Without further ado, my classroom...

First some, in the process pics:
When I walked in
Trying out desk arrangements


More desk arrangments
And one more failed try
 
At the end of Day 1
At the end of Day 2


And ... then I forgot to keep taking in progress pictures, but here is my classroom a few weeks later, many days of working in the classroom and about a week of teaching later:
From the door.  I finally decided on 2 groups of six and 5 groups of 4.

Classroom library, math board, mailboxes, computers, and whole class meeting area.
This has also become this class' favorite work area.
This is the corner that is cut off to the right in the picture above.

A shot from the library/whole group area.
I can't wait to do We're So Proud next week!  See my post here.

Directly opposite the door.
This is my One Class, Many Cultures Board (see post here),  Welcome board (this will be my science board once we start science), and my Prefixes, Suffixes, and Roots Word Wall (This is new for this year and I am so excited!)
My desk (which I made take up WAY less room this year!),
Student Supply and turn-in table (on the right),  math manipulatives (white drawers to the right
and bottom of book case - I love that these are accessible to students all the time now).
Close up of "the bookcase."
Top shelf: Daily copies, my Copy File Laminate box (with birthday pencils sitting on top)
Second shelf: My school's Character Building Books, a tub of things for helpers
(parents, middle school volunteers, etc) to do, and paper clips/push pins.
Third row: Master copies of things I use regularly, Sub Binder,
Folders to hold temporary centers, one tub of math manipulatives, and empty space.
Bottom Row: Math manipulatives that the students can use anytime
(although I guess we need to talk about putting them back since there is a missing tub!)
On top of the drawers is the prize box, raffle, and
Caught Being Good (school wide positive behavior system)

Front left of the room. 

Close up of the front left of the whiteboard.
This has our schedule and procedures we use daily, like our Morning and Afternoon Routine, When You Finish Early List, who the Lunch Helpers are, and who the Homework Checkers are.


The Reading Workshop (loosely based on Daily 5) board.  This is under the whiteboard.
I'm trying desperately to make productive use of that space,
but I'm worried that it won't be a visible enough reminder of what they need to do.

Trying out hand signals this year.  So far, we're only using the 1, 2, 3, 4 and me too.
 I started getting overwhelmed because I couldn't remember what each one meant,
so I had to turn around and look at this (it's above the whiteboard).
These posters are from Clutter Free Classroom
(but I had to print in black and white and color them - the printer and I were fighting)

I'm trying out mostly group jobs this year (the big circles) with just a few individual jobs
(the little circles with blurred out names).  I'm sure this will get a whole post later on!

Is there anything in my room you'd like to see me write a post about?


I hope you enjoyed looking around and that your school year is off to a fabulous start!


Sunday, August 25, 2013

A Peek at My Week Linky!

Have you heard about Mrs. Laffin Laughings' new linky?  It's all about looking at what we're doing next week!

This coming week is my first full week back with the kiddos.  We had them for 3 days this past week, and I am EXHAUSTED!!!  Five days will be an adventure, I think.  At least we'll be getting started on our normal routine.


Here's a few things we will be doing:


  • Writing our Class Code.  We didn't get to it last week.  As a class, we brainstorm a whole bunch of rules/guidelines and then consolidate them (basically until we get to Be Safe, Respectful, and Responsible, which are our school-wide behavior expectations)
  • Launching Daily 5 (Read to Self and Word Work are my goals for this week)
  • Studying Place Value and learning about Math Workshop.  After the first two weeks of school, we rotate classes for math (we change about every month).  Like I did last year, I'm going to train my homeroom kiddos really well about Math Workshop so they can help the others learn my procedures during each rotation (since there will be a handful of mine in each class).
  • Studying Maps - I'm still working on planning this.  If you have any ideas, please let me know!
  • Building our working-time stamina.  Last week, they couldn't quietly work for more than about 10 minutes. 
  • Saving Fred - check out my post here if you haven't heard about Fred (he's in the Teambuilding section)!

What are you up to this week?

Tuesday, August 13, 2013

A Tale of Student Teaching Linky Party

I've been thinking a lot about my student teaching these past few weeks for a couple of reasons.  I have two friends moving from teaching first grade to fourth (like me going from student teaching to my own classroom).  One of those friends is one from my credential program, and she is coming to my district!

This couldn't be a better time for The Polished Teacher's A Tale of Student Teaching Linky Party!

First, I'm going to summarize my credential program because from talking to others and reading blogs, I think that my program was unlike many of yours.

It was 13 months long, June to the following July, and included a Masters in Teaching.  Here's a basic outline of our year:

  • June-August:  University Classes
  • August - December:  Starting on the first teacher-duty day, we were in our first placement.  For this quarter, we spent 3 half days (with university classes in the afternoon/evening) and 1 full day (with university classes in the evening) in our placement.  Fridays were all day university classes.
  • January-June: We were in our second placement.  At the beginning, it was the same schedule as before, but by April we were in the placement full time, with university classes only in the evening.
  • July: Finishing Masters

Without further ado:


What advice do you have for those starting student teaching?

Monday, August 12, 2013

Teacher Week '13: Let's Talk About Me

It's time for Teacher Week '13!

Today,

  1.  I am getting married in just under a year to the greatest guy!  I could not be more excited!!!!!
  2. I am getting ready to start my third year teaching 4th grade.  I love the curriculum and seeing the kiddos personalities blossom.  I could live without the girl drama.
  3. I decided that I wanted to be a teacher when I was 6 years old.  Until my junior year of college, I thought my dream age to teach would be preschool or kindergarten.   Now, I love my upper graders!
  4. I played water polo in high school and college (and did swim team in high school).  Now, I'm working on teaching myself to like running (which I have always HATED - hence the water sports).
  5. I love to sew, but don't make time for in enough.  I've been working on a quilt made of all my swimming and water polo T-shirts for about 3 years now ...
  6. I majored in creative writing in college. 
  7. I'm an only child.
  8. I like/need to sleep a LOT.  I basically can't function on less than 7 hours.  I can easily sleep 10-11 hours if I don't set an alarm!
  9.  I have always been ridiculously organized.  Yet, somehow, my classroom is not.  I'm working on that!
  10. I keep myself very busy.  My fiancé always says that I don't know how to have free time!

I'm excited for the rest of Teacher Week.  Unfortunately, I will have to skip tomorrow's link up because my room is not ready enough to show! :(  I'll be showing it sometime next week probably!  I can't wait to learn more about all of you and see your classrooms tomorrow!


Sunday, August 11, 2013

Monday Made It - Reading Records, Bathroom Passes, and Organization!

The last Monday of summer.  Next Monday kicks off our school year (no students until Wednesday).  Of course, I'll be in my classroom all day today and at training for most of this week.  But, I'll pretend it's still summer.

The rapidly approaching school year has kicked my butt into productive mode though, so I've got a few Monday Made-Its to share!


First up, Bathroom Passes:


At the beginning of each month, I give each student a bathroom pass with the word "bathroom" on it.  Each letter is a pass.  When they need to go, I cross out a letter (of course, we still have the talk and expectations about when appropriate times to go are).  At the end of the month, unused letters become tickets for our raffle.  This is the system that all 4th grade has used at my school the past two years.

I like to have the name of the month on the bathroom passes.  Some of my teammates just rotate through the colored paper we have, but I could never remember which color I was on.  So I made one for each month.  I'm going to copy them all as soon as our copy machines are up and running so I am ready!


Next, Reading Records:

I gray out the days that they do not have to get their log signed (weekends, including Fridays, and days off of school).

Parent signed reading logs are expected at my school. My first year and a half, I used a half sheet of paper each week that students had to write how many minutes they read each night and have a parent sign.  I HATED collecting them each week and would often forget to make sure I had copies each Monday.  So, part way through last year, I switched to monthly logs.  It's still just minutes and parent signatures, but I only have to collect it once per month.  Most of the kids really liked the calendar aspect of it! I made the fonts match the bathroom passes and I'll copy them on the same colored paper (one of those cute, but doesn't matter things, I know).


Would you like to use these too?

Click HERE for the link to the bathroom passes and reading records.  All days are white on this reading log since I don't know your schedule :)


And last, some cute organization:

Label shape from Ladybug's Teacher Files; Font: Oh {Photo} Shoot
I used lots of Mod Podge to stick those cute papers on!
They match my turn-in boxes nicely (though I wish I had found this paper before I made those!)
I decided to do Copy, File, Laminate instead of Copy, File, Grade for a couple of reasons:

  1. It's just not realistic to think that my grading will all fit in that drawer :(
  2. I feel like I always have some small little thing that needs laminating but doesn't seem worth turning on the laminator, so I save it for later, when I have a bigger job.  BUT, then I forget or misplace that small thing.
Alright, I'm off to my classroom now to see if I can get it ready enough to show you all tomorrow for Teacher Week '13!

Wednesday, August 7, 2013

School Supply Shopping!

I did it.  The big back to school shopping trip is DONE.  I'm sure there will be plenty of smaller ones to come, but none that fill up my trunk like this one did.

What did I get, you ask? (all photos found via google search - my things are packed in my car ready to head to the classroom)

From Office Max:

For Writing Notebooks
Two backs of black and one of blue - I'm taking bets on how long these will last!
Tune into Monday Made It next week to see what this turns into!

From Walmart:

105 of these babies.  35 each of purple, green, and black.
Does anyone else feel like a crazy person searching through bins for a bunch of the same color?
I just want to turn to everyone and say "You don't know how much time it saves
over the year to be able to say Get out your green notebook!"
But of course, I don't, because then I'd seem actually crazy!
33 of these - I'm going to try having each kiddo keep a clipboard in their
desk so we can transition from desk to carpet quickly.


My first time buying fun duck tape.  I'm excited!!!!

A must have for setting up my classroom and student supplies.  This, and masking tape!
35 blue ones - trying a new system for spelling this year!
For making whiteboards
For ????  I don't know, they just called to me.
Dry erase dots.  I got 9 of  them in a couple of colors.  Again, not a specific plan but they were 3 for a dollar!

Check back in the coming weeks to see what I do with all of this loot!  For now, I'm off to get my classroom keys ...


What's on your back to school shopping list?


Monday, August 5, 2013

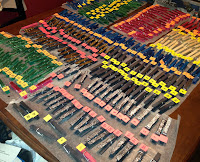
Monday Made It - Clips Galore!

After a summer of slacking on school things (and just organizing when I wasn't), I finally took on the biggest and most important crafty project of my summer - making all of my behavior clips!  I've posted about my behavior chart before here and here, but here's the quick run down:  When a student ends the day on "Excellent Effort" (side note: I'm thinking about switching the order of Role Model and Excellent Effort - what do you think?), he/she gets to put a sticker on his/her clip.  When there are 6 stickers on the clip, he/she gets a new clip.  The new clip is a new color.  My kiddos last year loved it!

And ... now I am all set for this year, even if every single student gets all the way to the elusive GOLD GLITTER CLIP!!!

I'm linking up with 4th Grade Frolics for Monday Made-It to show off my work and give you some tips if you are planning to color and glitter any clips!


First, I dyed the clips using Rit dye.  If you're using warm water, it takes 15 minutes to an hour to get good color (depending on how much dye you put in and how deep you want your color to be).  If you're using room-temperature water, it takes a LONG time (overnight worked well).  I used warm water from the tap for the first batch of each color (so the dye would dissolve) and then reused the same dye-water for the rest of the batches.

Note: Wood floats.  Don't be like me and think that if you make it deeper, it will cover the whole clip.  
It won't. You've just got to turn then every once in a while.
Then, they had to dry.

Next up, GLITTER (for those superstar students who get to their 5th or beyond new clip).  

Because of the glitter I had, I used two different methods.  Here are my pros/cons of three methods (one I did last year as I scrambled to make clips mid-year):

Hot Glue and Loose Glitter:
Pros: Fast
Cons:  Doesn't look as great, some glitter falls off

White Glue, Loose Glitter, and Sealant:
Pros: Pretty
Cons: Count the steps and supplies needed (put on glue, spread it around, put on glitter, shake off glitter, let dry while you painstakingly try to clean up the glitter, spray with sealant, let dry)
 
 
And ... maybe it is the sealant I chose or my spraying technique 
... but my fingers were still covered in glitter after handling these.
Glitter Glue:
Pros: It looks pretty and there's no glitter to clean up.


GLITTER GLUE FOR THE WIN!
Seriously, I don't think I will ever do 
any more clips with loose glitter.
The loose glitter and glitter glue ones drying in peace (and some plain black ones sneakily preparing for the next step).
Side note: It seems like the poor red ones always got left out of the pictures :(

Last, glue on numbers so they are good and ready for your Behavior Superstars (I actually did this before the sealant on the loose glitter ones and it worked just fine).

And, without further ado, the finished product:
Each color is in number order on a scrap of cardboard.  I think this will keep them nice and tidy.
Students get a plain clip on the first day of school (upper left), then black, blue, green, red,
red glitter, green glitter, blue glitter, silver glitter, and finally gold glitter.

I have at least two extras of each color (I guess I wasn't so hot at counting on this ... but extra extras can't hurt!), so I'm clear for at least two new students to come mid-year.  Being prepared will make it not happen, right?!?!

What have you made lately?  

Head over to 4th Grade Frolics and link up!

P.S.  Really, do you think I should switch Excellent Effort and Role Model?  I'm torn!